Okay, so I know "picnic" and "chic" don't actually rhyme, but they look like they do . . . so we'll pretend. :D
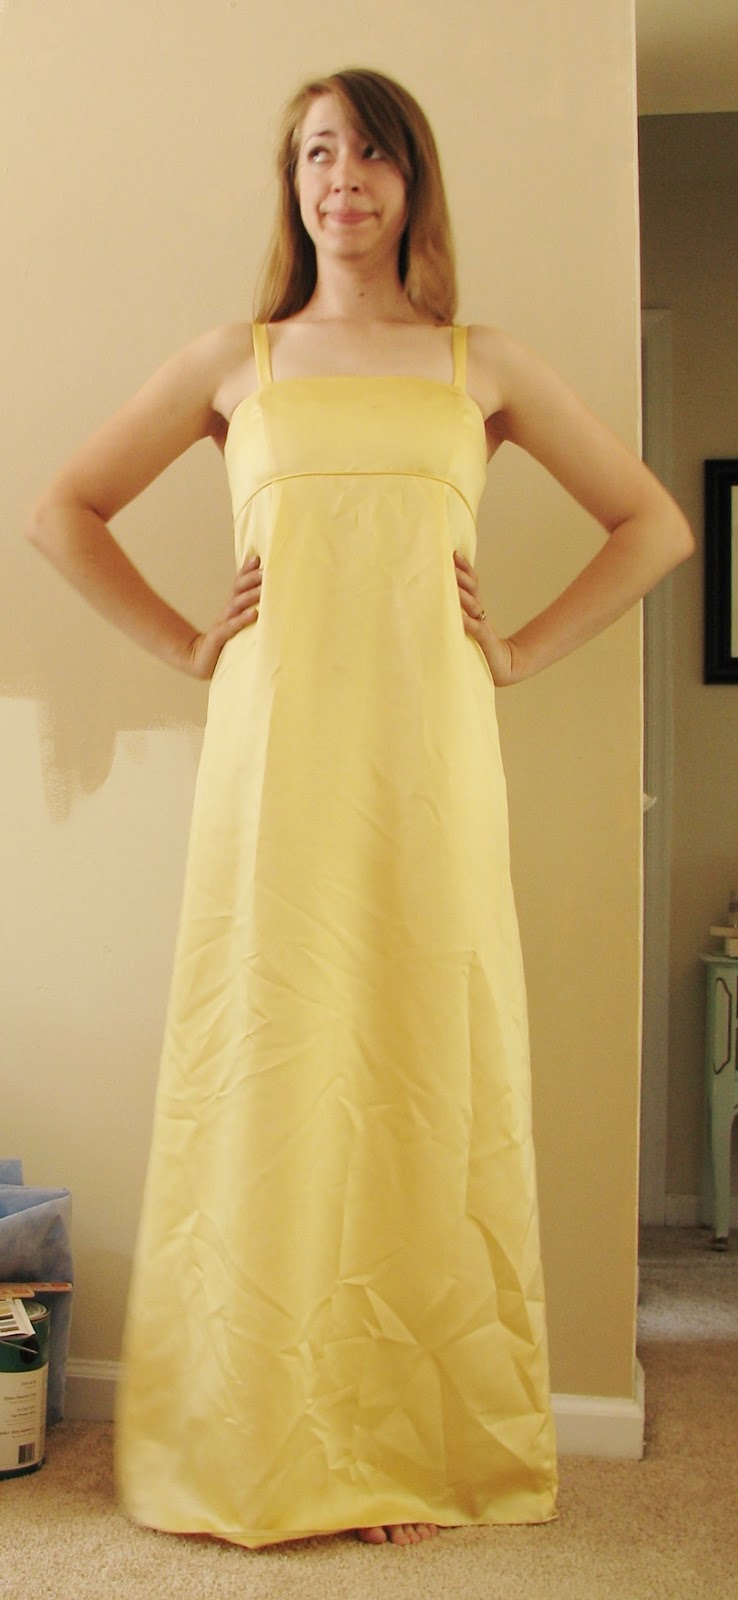 |
| Sunny yellow! nice and simple. |
But what are these??
 |
| Ack! Stains! |
This dress needed a cute summery update! Fortunately, I had the perfect material to cover that top bit.
 |
| yellow and white checkers! |
 |
| Light and airy - and it'll bring a casual touch to the dress! |
I started with the chop.
 |
| Knee-length CHOP! |
I took the length of checkered cotton and measured it against the bodice.
 |
| And by 'measured', I mean 'eyeballed it'. And then cut it. |
Next came a quick gathering stitch along the bottom!
 |
| Zip it through! |
And then pullllll that thread!
 |
| But don't break the thread. That ruins everything. |
Once my material was all gathered nicely, I pinned it to the bodice!
 |
| Why this way?? Because . . . |
I wanted that little bit of ribbing to still show, and I wanted the gathers to start right above it . . . so I knew I'd have to do some hand sewing.
 |
| Like this, with the hem tucked under, sewing underneath/through the ribbing! |
Before finishing the new bodice, I realized it needed to be ironed.
 |
| I really need to start ironing things BEFORE I sew them together. |
Then I pinned and hand-gathered the top, rolling the hem under as I did so.
 |
| You can barely see them, but there's safety pins GALORE. |
I thought I'd be able to machine sew the top part, but when I tried it, it looked AWFUL. Blegh. So back to hand-sewing, with a slipstitch!
 |
| Keeping it invisible! |
Phew! On to the skirt!
That lining was SUPER fray-tastic, so it needed to be addressed first.
 |
| Rolled and pinned! |
And I even pressed that hem before sewing it. ... Are you supposed to do that? Or wait until after you've sewed it? But I thought it would make it easier.
 |
| Except ironing a hem that has pins in it is not easy at all. I'm so silly. |
So then I sewed it up!
 |
| I turned the dress inside-out, btw, so the hem will be on the inside. Just so ya know. |
Somewhere around here I realized that the dress needed ironing too. Sigh.
 |
| Seriously. Iron things first. It's just better. |
Now I could've done the exact same thing for the skirt's hem, but I wanted to it to be unique, and I had the right tool for the job!
If you remember this tutorial, I did a lot of cutting with my wood-burning tool. I'm bringing it out again!
 |
| Doesn't take much heat to melt right through synthetic polyester! |
I decided to make a scalloped edge, and added a little faux-eyelet detail in there, just for kicks.
 |
| Cutting out tiny circles! |
Remember - if you're going to experiment with this, make SURE you've got a wooden board that you don't care about underneath! DON'T use plastic, cardboard or carpet. Seriously.
Now, I could've just been done right there, but I wanted a little more modesty than those teeny little straps were giving me. Time to add sleeves!
I started by gathering the left-over checkered material, right down the middle.
 |
| It's a little thicker on the left side because this scrap had once been a kitchen curtain/valance. Hah! |
I then wrapped one side of it around one of the straps, leaving the gathered middle just at the outer edge of the strap.
 |
| Does that even make sense? |
I did that with both straps, cutting the excess off just a little below the top edge, so I can hem it.
 |
| Eyeball and SNIP! |
Instead of attempting to hem the inner material (the outer edge is pre-hemmed, courtesy of whoever made this scrap curtain), I wrapped the extra material completely around the strap.
 |
| Now you see it . . . |
 |
| Now you don't! |
So now there'll be no loose edges when I sew it together - which took more hand-sewing all the way around. And that's it!
Ready for summer!


I'm pretty happy with how this one came out - what do you think?
This dress is for sale at the HopeCycle Refashions Etsy store for only $50! Go check it out! All profit from your purchase will be donated to fight Sex Trafficking in America!
Mwa! <3

No comments:
Post a Comment