Showing posts with label no-sew. Show all posts

Wednesday, August 13, 2014

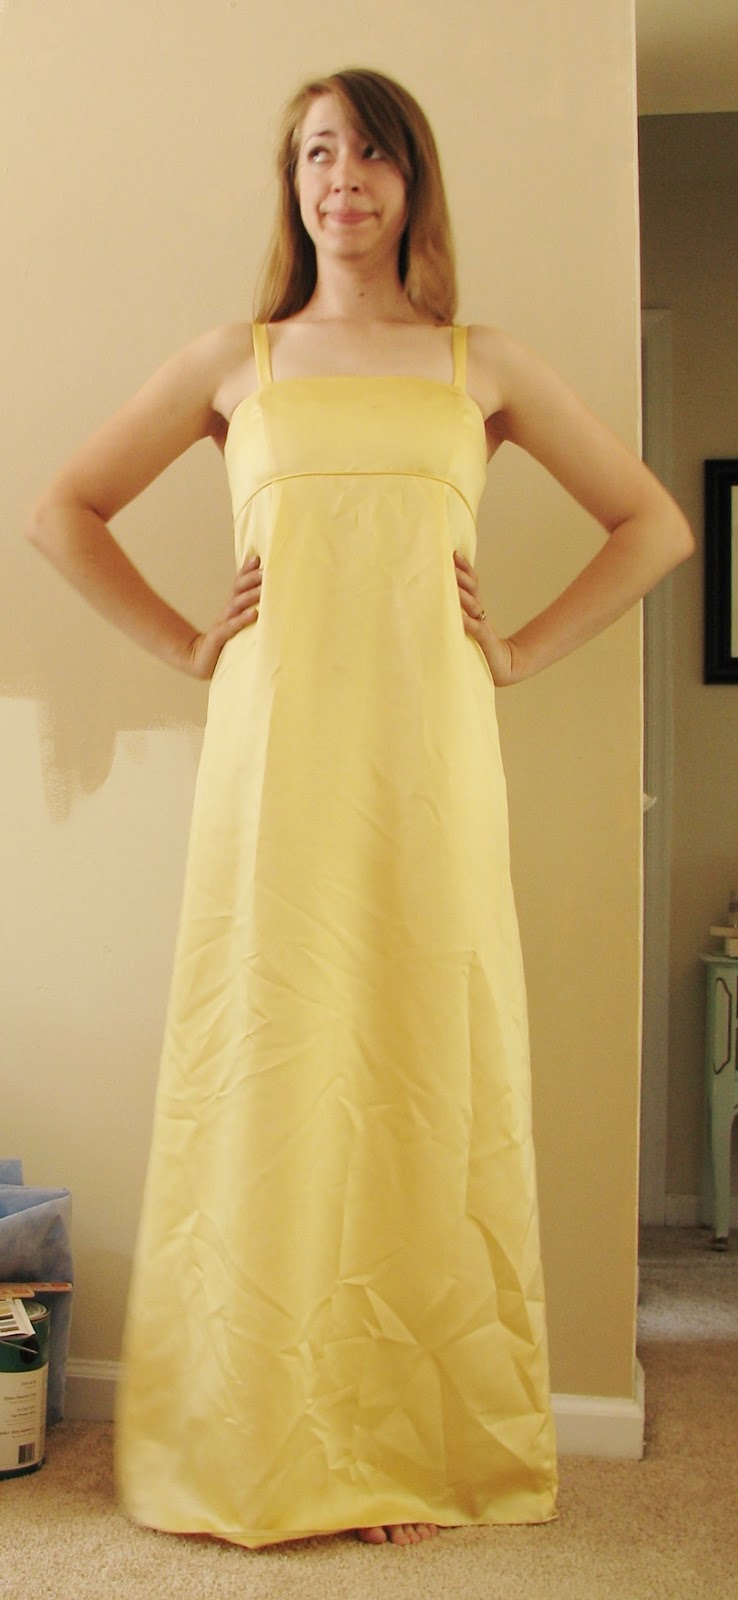
Lilac Bridesmaid to Lovely Day-Wear!

This past Christmas, my little sister got married, and I got to wear this dress in the wedding!

Photo credit to Sherry Lynn Photography! She did my wedding, as well!

It was gorgeous. I loved it. But . . . how often do you get a chance to wear a dress like that? I mean, really?
So of course, it was time for a refashion!
Here it is, ready for the chop!
I used a pencil to draw where I thought I should cut, so that both sides would be even.
I trimmed through each layer separately, and ended up cutting through 3 different layers, making them all slightly different lengths, the sheer top layer the longest.
Inverted V in front, a bit of a tail in back. Left the side scarf bit alone!
Now, if you've ever worked with polyester (and this was polyester chiffon, polyester satin, and polyester lining), you know the stuff can fray like CRAZY. Time to pull out the heat!
My woodburning pen burns hardly any wood, but LOTS of fabric!
I carefully ran the edge of the woodburner's nib along the cut fabric, sealing the edges, and fixing any uneveness. 

And that was it!
Ta-DAH!

You can do so many things with that long scarf bit!

Dress it up!

Dress it down!

I love leaving the scarf draping in the back! So pretty!
This new top will be up in the Etsy shop soon, so keep your eyes peeled!
Thanks for reading! 
Mwa!


Saturday, July 19, 2014

2 Boring T Shirts into 2 Beachy Vests! ~No Sew Tutorial

GUYS. In case you haven't noticed yet . . . it's HOT.
Which makes me feel like this.


But! With my new swimsuit I just made, I can head to the pool! However, our apartment guidelines say you have to wear something over your suit to walk to the pool, and I've been really wanting something light and easy to take on and off!

So I made two different versions of vests:

Start snipping!
One sleeve had already been harvested for other purposes
Annnnd here's where I forgot to take a picture. So I doodled for you :)
Orange lines are where I cut!
Yeah . . . honestly, I don't even know what Mighty Oregon IS (unless it's just the state . . . but the adidas logo tells me otherwise), and I didn't feel like having it on my new vest. So I snipped it off!

Then I tied the new straps I'd cut, and started cutting some fun fringes!
REALLY took me back to camp days . . . I used to fringe-ify my shirts all the time then!

And the bottom needed fringe too. Because I said so.
Left side is what it looks like before you pull on the cut pieces. Pull your fringe!

Vest #1! Boho fun!
Yay fringe!

I kept the Might Oregon "O" - why not?

My second vest started out like this!
Still hot and miserable.

Cut off the sleeves and neckline!

Cut off the hem, cut up both sides, and I widened the new back for a thinner halter-neck.

And that's it!

(To see the original/inspiration blog for this, visit Wobisobi!)


So that's it! 2 super-fast, super-easy no-sew refashions! :D
Happy Summer!
Mwa!


Thursday, July 10, 2014

Fastest Tshirt Refashion EVAR! (no sew!)

So after a couple false-starts on refashions (where either something didn't work, or my end pictures didn't turn out right), I just wanted to get SOMETHING done to show you guys I'm still alive!
And I found the perfect candidate.

It's not a bad shirt! Men's Medium?

It's been MONSOONING all afternoon, so comfy clothes was the order of the day. This tshirt is fine, as far as regular ol' comfy tshirts go, but I wanted something cute as well as comfy!

I was inspired by the trimming done on this refashion by CTA Glam Couture
Someday I'll do their actual thing - the darts looks cute!
 
So I layed that shirt down and did some snipping!
I cut about an inch from the collar on both sides, and just under the collar on front and back.
 The sleeves were still lacking something for me, so I made another snip!
Right up the middle!

Then I took those two cut pieces and tied them together in a knot.

And that was it! Ta-dah!
Still comfy, loads cuter!
You know you want to go do this now ;)

Seriously, guys - it took longer to take the pictures than to do the refashion. Yay for a quick no-sew!
Thanks for stopping by!
Mwa!


Monday, September 2, 2013

3 No-Sew Pillow Covers

Happy Labor Day!

I'm really excited about today. We aren't doing anything special (no cookouts, no parties, no chips and dip), but I actually have the day off.
The whole day off. From wake-up to bedtime. No work.

THIS NEVER HAPPENS.

So I made myself a scheduled list to get everything done! I'm already ahead, and loving it. :)

This project in particular, I'm really enjoying! What better way to fritter away your labor day than sprucing up your living room for FREE with clothes you already have, and no sewing required?

A weekend or so ago (before the hubster's semester started), we FINALLY got around to finishing painting our walls. They looked like this for the longest time;
Paint sample abstract art! For . . . months and months.
Which is why in most of my before pictures, you can see this weird patchy pattern behind me.
Yeah. That's 'cus we never got around to actually painting. Oops.

But we finally got it done! TADAH!
The back wall is more of an aqua/pale teal than this picture shows, and the right wall is latte.

Well, now that's done, we could finally start updating our decorations to coordinate! Specifically these couch pillows - and just in time for fall!
These are pillows that say "Meh."

Inspired by this tutorial, I'm proud to introduce to you...

3 No-Sew Pillow Covers

 - from clothes lying around your house!

Pillow 1: The Maxi Dress

Love the patterns on this dress!

Place pillow in the middle

Overlap each half of the skirt
Tie the ends! I gave myself a little more on the skirt side than the top side, since I'll be hiding the top part.
Tuck in the top part, and pull the leftover skirt bit over, to look like a knot. Safety pin in place, and voila!

Pillow 2: The Peasant Skirt

Love me a good hippy/boho/peasant skirt!
Place pillow in the middle!

Fold the waist and bottom over
Fold the remain sides over, and safety pin in place!

How easy was that?!

Pillow 3: The Turtleneck

Stretchy turtleneck, meet 14x14" pillow!
Stuff!
Tuck in that neck!

Fold under the bottom ends . . .
And pin in place (on the same side you tucked in the neck)

Flip it around, and tie those arms!
Knot them -

Tuck in your ends, and you're done!


And that's it!
The possibilities here are endless - skirts, silk scarves, table cloths . . . changeable for every season!
How fun are these??

Bonus! Bling it up with some extra-long necklaces!

Such a quck and easy update! How will you refashion your living room?

Happy Fall, ya'll!