Friday, June 14, 2013

Prom Bomb to Picnic Chic!

Okay, so I know "picnic" and "chic" don't actually rhyme, but they look like they do . . . so we'll pretend. :D
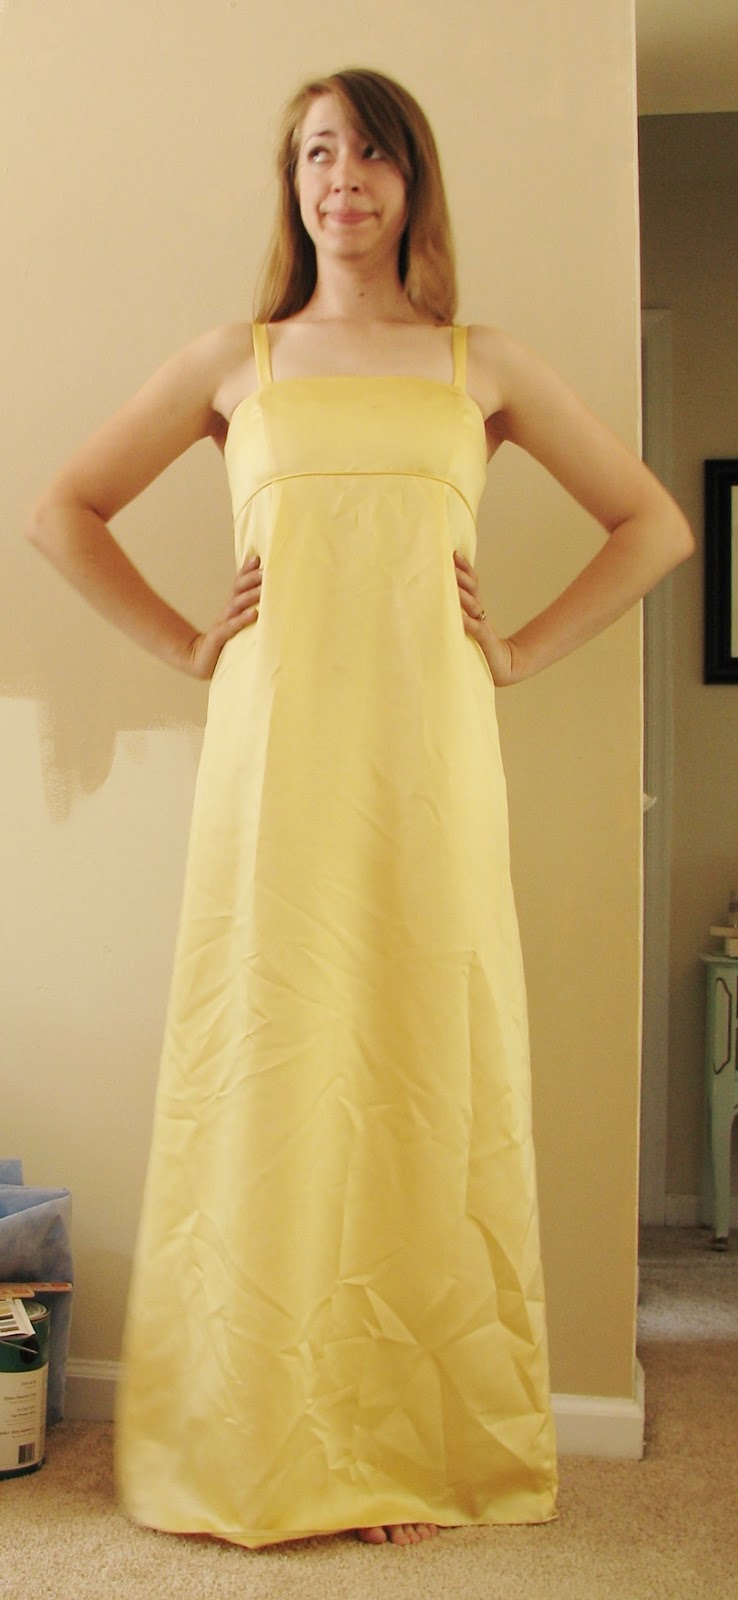
Sunny yellow! nice and simple.
 But what are these??
Ack! Stains!

This dress needed a cute summery update! Fortunately, I had the perfect material to cover that top bit.
yellow and white checkers!
Light and airy - and it'll bring a casual touch to the dress!

I started with the chop.
Knee-length CHOP!
I took the length of checkered cotton and measured it against the bodice.
And by 'measured', I mean 'eyeballed it'. And then cut it.
Next came a quick gathering stitch along the bottom!
Zip it through!
And then pullllll that thread!
But don't break the thread. That ruins everything.

Once my material was all gathered nicely, I pinned it to the bodice!
Why this way?? Because . . .
I wanted that little bit of ribbing to still show, and I wanted the gathers to start right above it . . . so I knew I'd have to do some hand sewing.
Like this, with the hem tucked under, sewing underneath/through the ribbing!

Before finishing the new bodice, I realized it needed to be ironed.
I really need to start ironing things BEFORE I sew them together.

Then I pinned and hand-gathered the top, rolling the hem under as I did so.
You can barely see them, but there's safety pins GALORE.

I thought I'd be able to machine sew the top part, but when I tried it, it looked AWFUL. Blegh. So back to hand-sewing, with a slipstitch!
Keeping it invisible!

Phew! On to the skirt!
That lining was SUPER fray-tastic, so it needed to be addressed first.
Rolled and pinned!

And I even pressed that hem before sewing it. ... Are you supposed to do that? Or wait until after you've sewed it? But I thought it would make it easier.
Except ironing a hem that has pins in it is not easy at all. I'm so silly.

So then I sewed it up!
I turned the dress inside-out, btw, so the hem will be on the inside. Just so ya know.

Somewhere around here I realized that the dress needed ironing too. Sigh.
Seriously. Iron things first. It's just better.

Now I could've done the exact same thing for the skirt's hem, but I wanted to it to be unique, and I had the right tool for the job!
If you remember this tutorial, I did a lot of cutting with my wood-burning tool. I'm bringing it out again!
Doesn't take much heat to melt right through synthetic polyester!

I decided to make a scalloped edge, and added a little faux-eyelet detail in there, just for kicks.
Cutting out tiny circles!

Remember - if you're going to experiment with this, make SURE you've got a wooden board that you don't care about underneath! DON'T use plastic, cardboard or carpet. Seriously.

Now, I could've just been done right there, but I wanted a little more modesty than those teeny little straps were giving me. Time to add sleeves!

I started by gathering the left-over checkered material, right down the middle.
It's a little thicker on the left side because this scrap had once been a kitchen curtain/valance. Hah!

I then wrapped one side of it around one of the straps, leaving the gathered middle just at the outer edge of the strap.
Does that even make sense?

I did that with both straps, cutting the excess off just a little below the top edge, so I can hem it.
Eyeball and SNIP!

Instead of attempting to hem the inner material (the outer edge is pre-hemmed, courtesy of whoever made this scrap curtain), I wrapped the extra material completely around the strap.
Now you see it . . .
Now you don't!

So now there'll be no loose edges when I sew it together - which took more hand-sewing all the way around. And that's it!

Ready for summer!


Not too shabby! :)
I'm pretty happy with how this one came out - what do you think?

This dress is for sale at the HopeCycle Refashions Etsy store for only $50! Go check it out! All profit from your purchase will be donated to fight Sex Trafficking in America!

Mwa! <3

Friday, June 7, 2013

Awkward Dress to Sparkly Skirt Tutorial

This pretty donation has LOTS going for it; layering, side-ruching, sparkles . . . too bad it doesn't fit!

I'm also not a big fan of the whole halter/v-neck thing.

This was an easy one! I started by pinning the two layers together so that the fabric wouldn't get weird.
Right under the bustline!

And then I started to chop!
Snip snip snip!

Keeping the pins in place, I turned the dress inside out and folded over a large hem. When I was satisfied, I carefully took the pins out and then repinned them through the folded layers.
See where this is going?
I made a little rolled hem, but as you can see, I've made an inch and a half wide tube - for an elastic waistband!
Now, I don't have thread to match this material . . . so I made do with purple for my upper thread and black for my bobbin thread.
The purple's on the inside, and the black's on the outside! No one will ever know! XD

And then I started to sew!
Well . . . I almost started to sew. Right here is when my sweet husband came in and reminded me that I'd left rice cooking on the stove. I ran like the wind.  ...Apparently rice can be 15 minutes over cooked and still be okay. Hopefully. :D We'll find out at supper tonight.

So once I came back and actually finished sewing, I made sure to leave about two inches of space so I could fit my elastic through. 
Make your life easier; put a safety pin on the end you're threading!

Then I sewed the ends of the elastic together and sewed up the little hole! All done!

TaDah!

The great thing about this skirt is the stretchiness; it's comfy and airy, and you can wear it any point on your waist - empire, natural, dropped, whatever!

This is an easy way to keep around old dresses that you still like, but don't want to wear as a dress any more! Send me a picture of your refashioned dresses, and get featured on the blog!

Thanks! <3

Tuesday, May 28, 2013

Peasant skirt to Princess Dress

So a couple weeks (months??) ago, I posted this picture on the HopeCycle Facebook page, asking what viewers thought I should do with it.

Such a pretty, mottled green crushed velvet skirt! I just don't wear it any more.
So what to do with it?
Turn it into a DRESS!

I started by putting the skirt on as if it were a sleeveless dress, and creating some darts at my bust.
I think 'darts' is the right term . . . right?
So that's just taking a pinch of the fabric and pinning it in place. Here's a side view.
Suddenly fitted!
You'll notice the back is hanging loose and unfitted, so I did the same thing. Here's the slow-mo version.
Pinch the extra fabric!
Pull it to where it fits!
I then sewed the darts in place, just along the gathered seam there.

The skirt had a lining in it that was dyed the same mottled green-yellow. I chopped that out! (This is where I forgot to take pictures.)
I sewed the chopped out strip of material into a tube, cut that in half, and gathered each tube at each end. Then I pinned the ends where I wanted them on the top of the dress, and carefully sewed them on.

Ta dah! Straps!
Now, I didn't want my sewing to show through the band at the top of the dress, so I carefully handstitched (with a slipstitch) just into the first layer of the band.
You can't see the threads, but that shows where I was sewing.

Also, the material was fraying pretty quickly, so I made sure to sew up the ends of the straps with a blanket stitch to keep them all tucked together.
Like so!

I may be totally butchering stitch names while trying to sound knowledgeable. Apologies. ^^;
I ironed down the darts at the front and back, being careful not to leave weird marks on the velvet, even though the iron was on its lowest setting.
Its hard to taking ironing pictures that make any sense...

And that's it! Pretty easy!
Cute and comfy!
Dorky model pose! And look - LOOK at my arms! My right arm is so much tanner than my left . . . because I always sit on that side of the car and stick my arm out the window. It's a curse.

AND (this was totally planned and on purpose . . . I swear) the straps are adjustable!
Thin straps!

Cap sleeves! WHAT?
And here's the view from the back!
The darts added pleats! Cool!
Do you have any peasant skirts that need refashioning into dresses? Send me pictures when you're done! :D
Much love to all! <3